Introduction
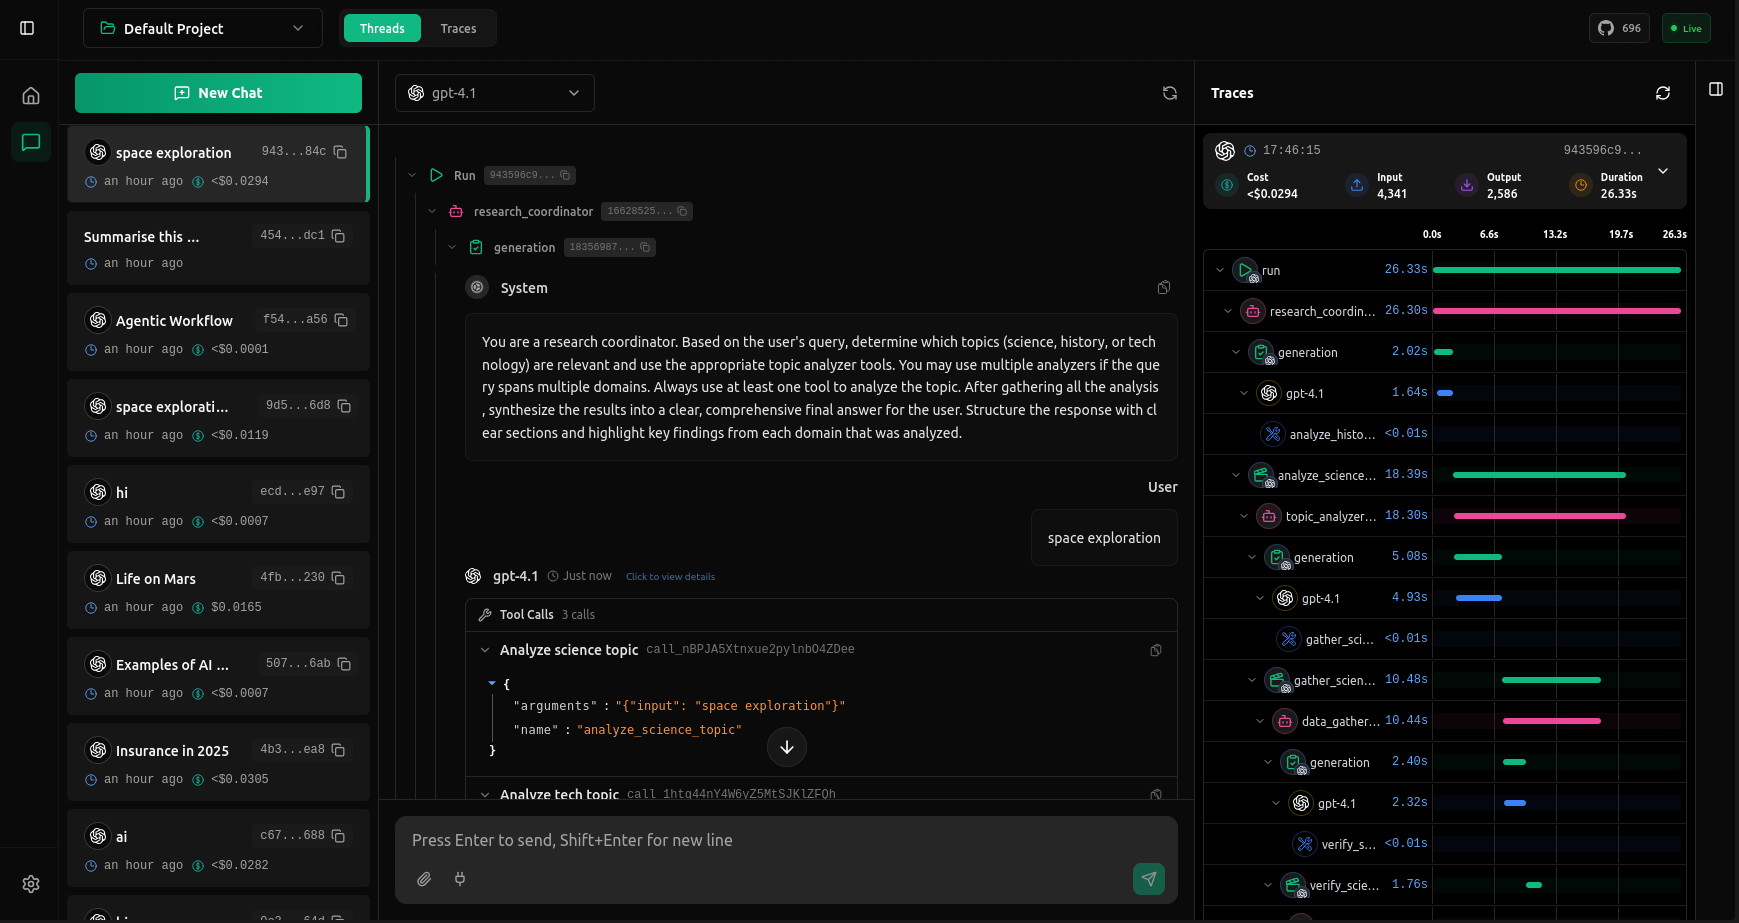
Debug your AI agents with complete visibility into every request. vLLora works out of the box with OpenAI-compatible endpoints, supports 300+ models with your own keys, and captures deep traces on latency, cost, and model output.
Installation
Easy install on Linux and macOS using Homebrew.
brew tap vllora/vllora
brew install vllora
Launch vLLora:
vllora
For more installation options (Rust crate, build from source, etc.), see the Installation page.
Send your First Request
After starting vLLora, visit http://localhost:9091 to configure your API keys through the UI. Once configured, point your application to http://localhost:9090 as the base URL.
vLLora works as a drop-in replacement for the OpenAI API, so you can use any OpenAI-compatible client or SDK. Every request will be captured and visualized in the UI with full tracing details.
curl -X POST http://localhost:9090/v1/chat/completions \
  -H "Content-Type: application/json" \
  -d '{
    "model": "openai/gpt-4o-mini",
    "messages": [
      {
        "role": "user",
        "content": "Hello, vLLora!"
      }
    ]
  }'
Now check http://localhost:9091 to see your first trace with full request details, costs, and timing breakdowns.